VsCode & PlatformIO
VsCode & PlatformIO
Installation
1. VSCode

Download: https://code.visualstudio.com/
2. PlatformIO Extension
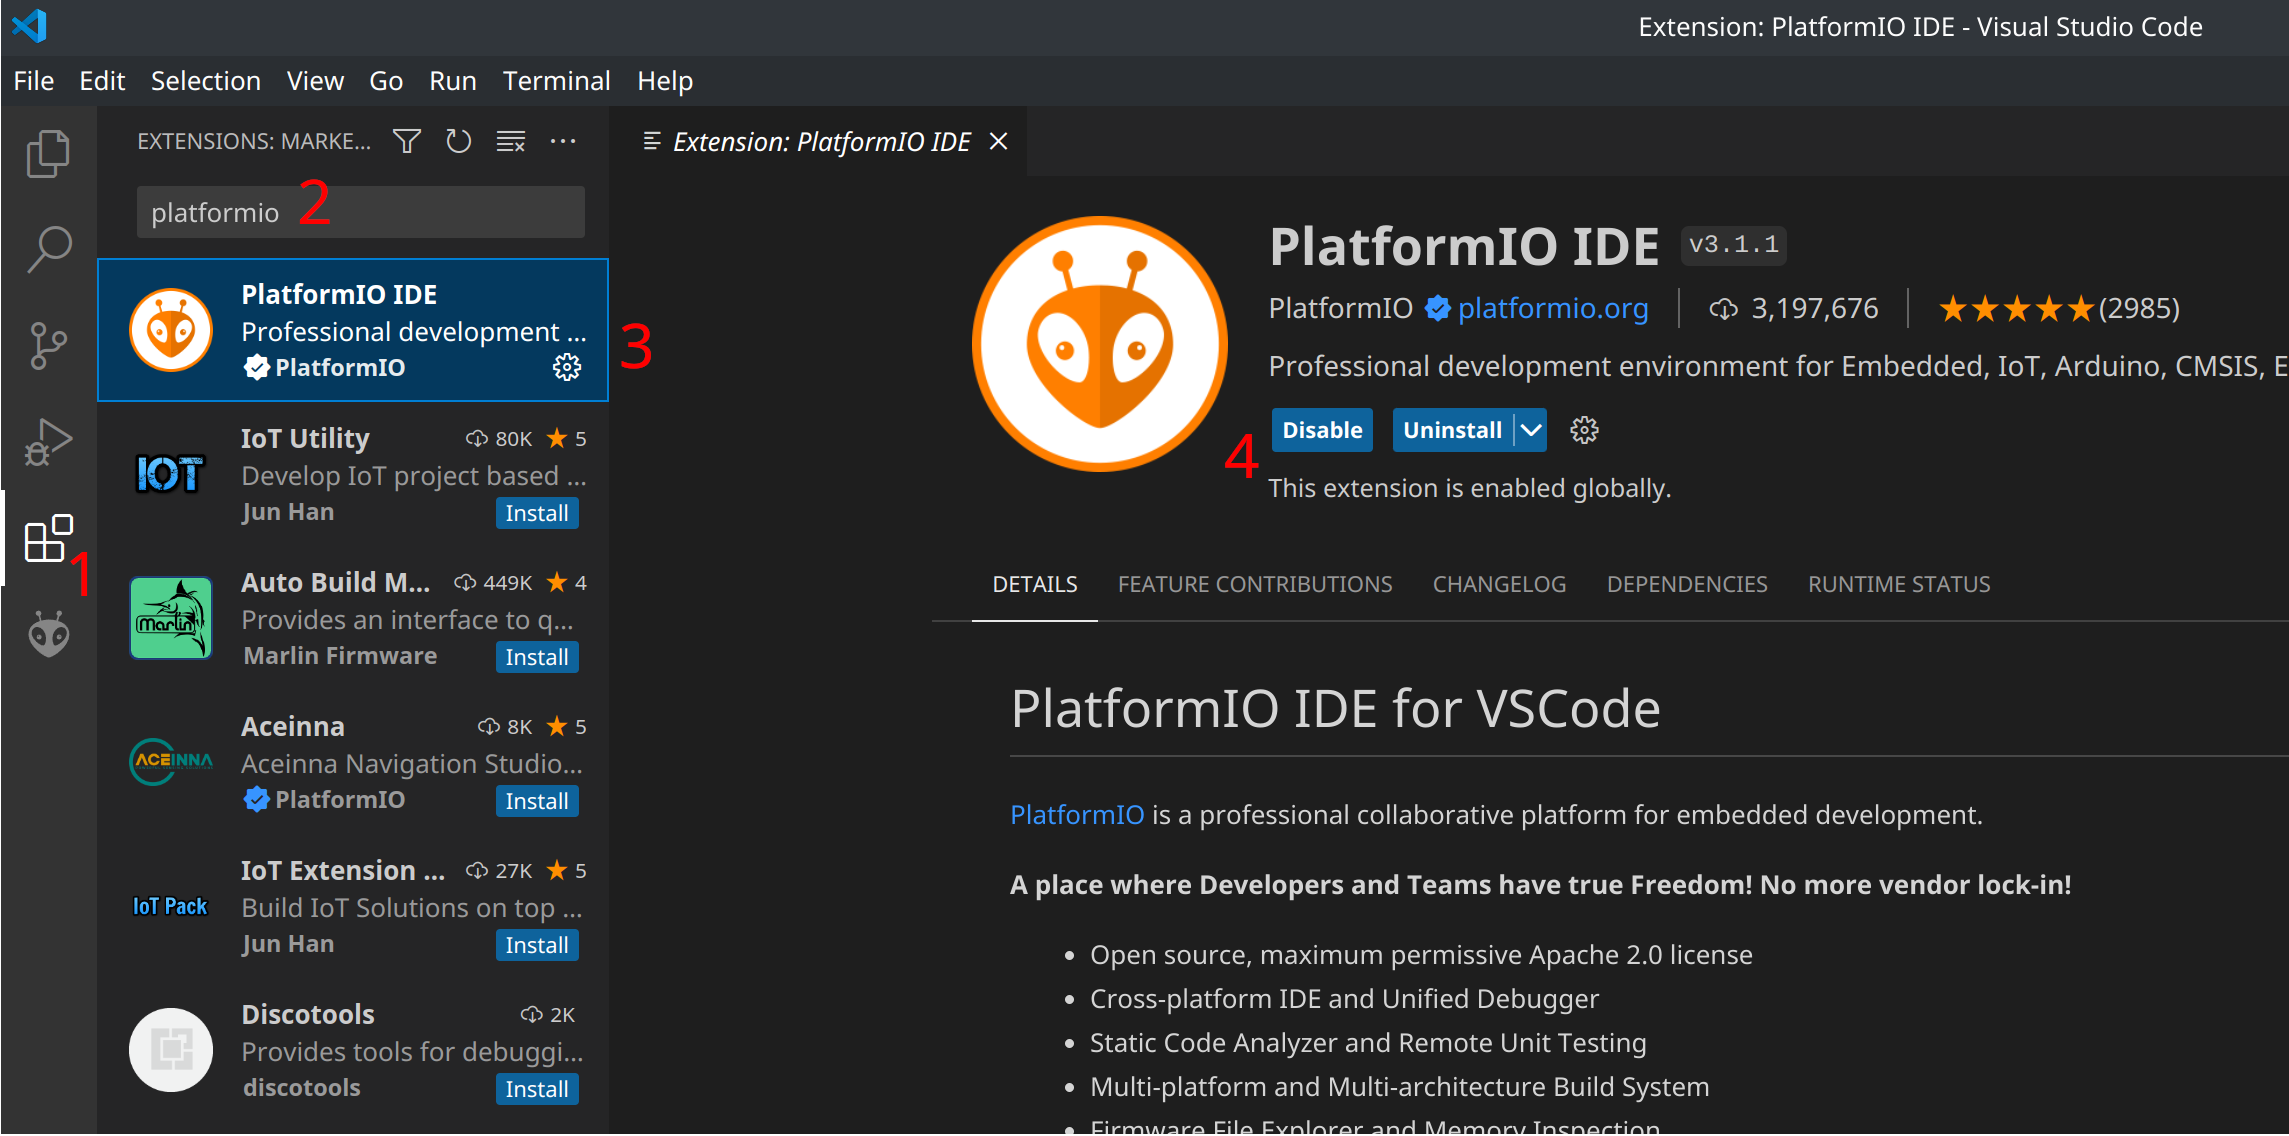
- Select the Extensions tab
- Enter "PlatformIO" in the search
- Select PlatformIO from the search results
- Install PlatformIO. VSCode will restart after installation.
Creating a Project
- Select the PlatformIO extension
- Choose PIO Home
- Select New Project
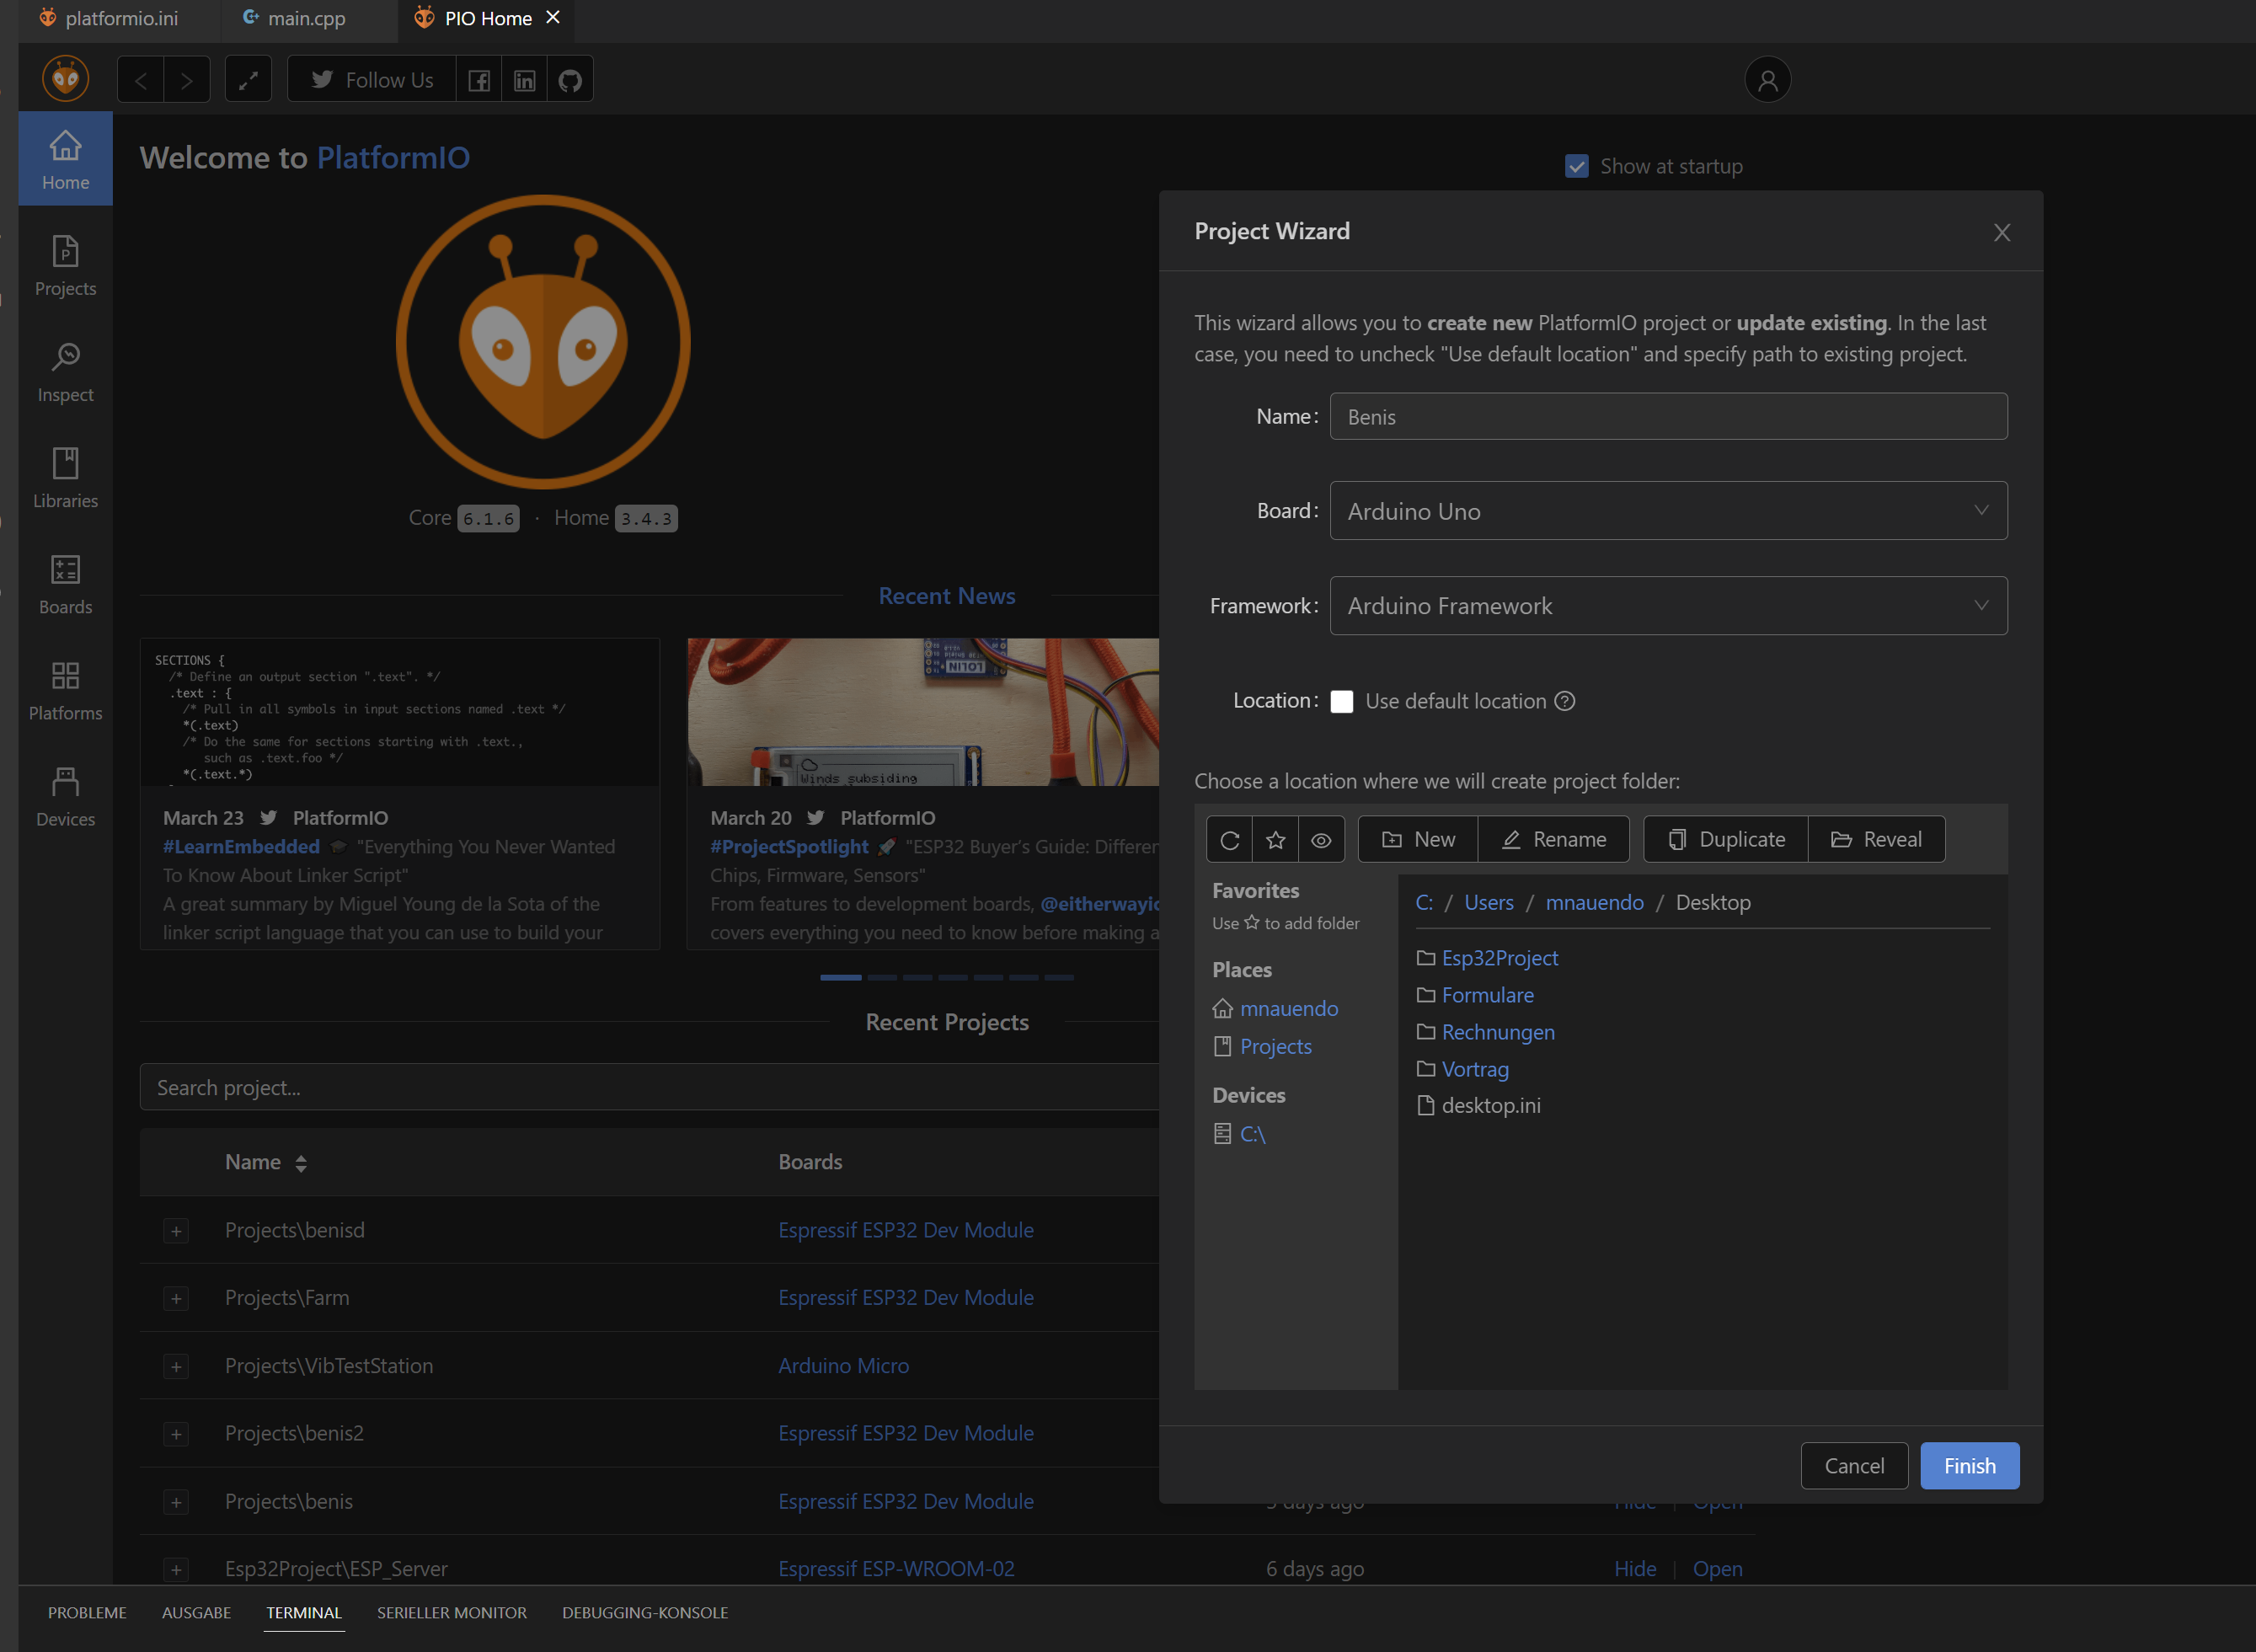
- Select Board & Framework:
- Board: ATmega328P (or Arduino Uno).
- Framework:
None.
- Wait for PlatformIO to create the project.
PlatformIO Folder Structure
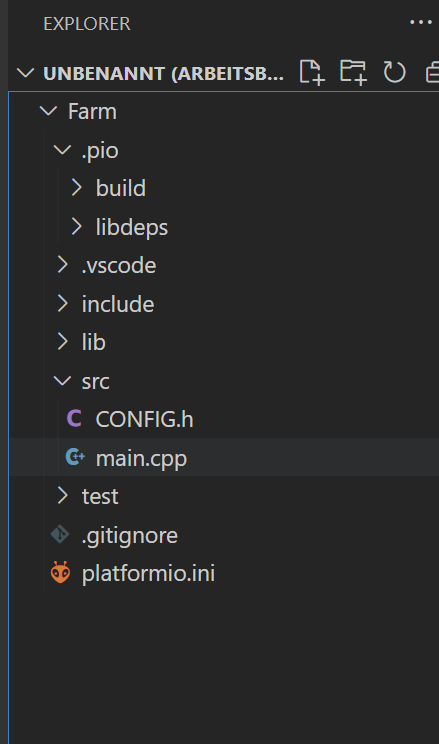
- .pio: Contains build files, libraries, and more.
- .vscode: Contains configurations for VSCode. Changes here are usually not necessary.
- include: Header files can be placed here.
- lib: Libraries for the project.
- src: Main code files. Your
main.cbelongs here. - test: For unit tests.
- platformio.ini: Central configuration file for PlatformIO.
platformio.ini
The platformio.ini is the central configuration file. Example configuration for ATmega328:
[env:atmega328p]
platform = atmelavr
board = atmega328p
framework = none         // if you use Arduino write it here.
upload_protocol = COM9   // look for your device port
The platformio.ini is the central configuration file for the project. Multiple environments (e.g., env:esp32dev) can be created to quickly switch between production and debugging. The file format is in YAML, so be careful with the indentation.
More info here:
Project Configuration
Environment Variables
Build, Debug, Upload

- PIO Home - Opens the PlatformIO homepage
- Build - Build the project
- Upload - Upload the project to the microcontroller
- Clean - Clean build files
- Test - Start unit tests or invoke the environment for testing
- Serial Monitor - Serial communication
- Terminal - A terminal with loaded PIO variables
- Environment - Quickly switch the environment
- Serial Monitor Config - Settings for the serial monitor
More info here: https://docs.platformio.org/en/latest/projectconf/build_configurations.html